|
THE TIP-UP RIFLE Harrington & Richardson Wesson & Harrington New England Firearms |
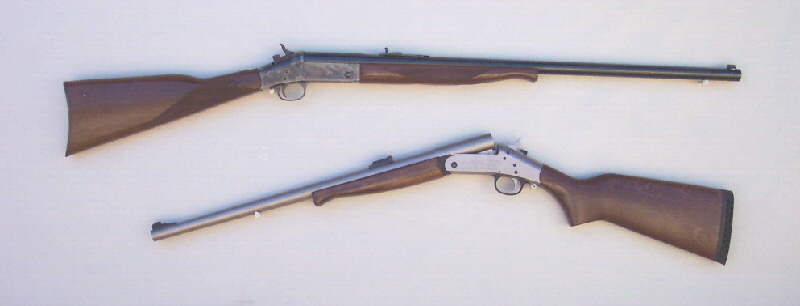 |
| We often see a type of single shot rifle at SASS events, in which the barrel hinges down to expose the chamber for loading. This design was one of the most common of the 19th century. I believe there were over a dozen different makes of rifles that operate in this manner. |
| The correct term for this rifle design is Tip-up. Today we often hear them called Top Breaks. The trade name Handi-Rifle is also used as a generic term for the tip-up design. We are fortunate to have these fine single shot rifles made available to us at reasonable cost, allowing many shooters to enjoy the activities requiring a single shot rifle. |
| The H&R, W&H, and NEF in the many different models, have one small problem in common. That is the automatic ejector. If you wish to mount a tang sight on the rifle, the auto ejector will slam the empty cases into the sight each time the gun is opened. While SASS does allow the use of the auto-ejectors in Plainsman, and Long Range Single Shot, they are prohibited in the Buffalo Single Shot category! To make the greatest use of the rifle it is necessary to alter the auto-ejector to an extractor only configuration. Having done that, you can enter all SASS competition categories. Unfortunately, if you wish to shoot the really fun Plainsman events, youll have to shoot against the auto-ejector equipped tip-ups. |
| There were no auto-ejector guns of any consequence, with the exception of the Trap Door Springfield, used in the 19th century. Since the Plainsman event is timed, I consider it a gross violation of the alleged SASS standard of Spirit of the Game to allow the ejector guns in the event. Ill get off my soap box now. |
| Whatever your reason, changing the auto ejector to extractor is a very simple job. Begin by removing the fore end screw, and the fore end. Remove the barrel from the receiver. Now examine the under lug. You will note the ejector, the ejector catch, and three roll pins. The rear most roll pin should be drifted out ( either direction ) until the ejector catch is free. I prefer to leave this pin retained in the off side of the under lug. In this way it wont get lost and is started, ready to drive back in. If you now pull the punch out, the ejector catch will drop downward and the ejector will move outward. If the ejector does not seem to be free, just pull down a little on the end of the ejector catch. Figure 1. shows the parts I have mentioned as well as a second ejector that has been ground down. Modification of the ejector required about 5 minutes with the use of a common Moto Tool. Refer to the drawing in figure 2., to see what metal needs to be removed. |
Figure 1
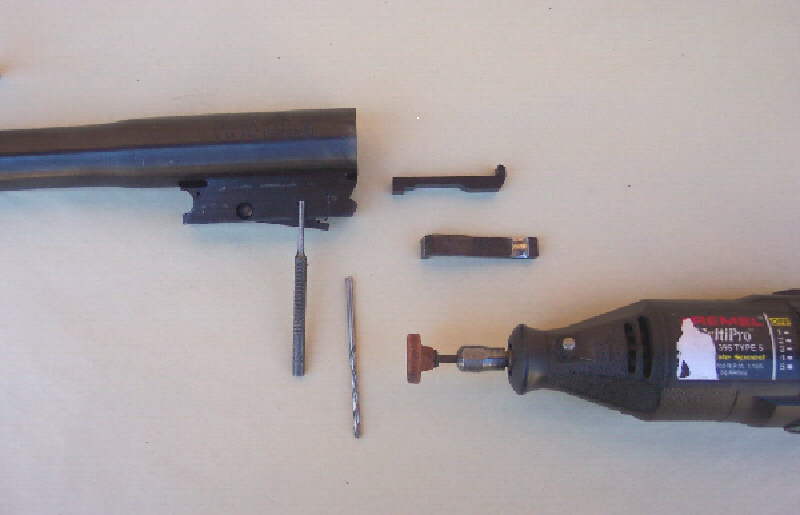 |
Figure 2

Remove Shaded Area |
| There are two springs in the under lug. They will not fly out, nor will the ejector ( nothing will go sproing and fly across the room ). In figure 1. you will note the pin punch, which is a 5/32 diameter. You will also see a #36 twist drill. To reassemble, insert the modified ejector into its slot in the under lug and press in against its spring. Now press the ejector catch upward into place and insert the drill bit in the pin hole. The drill bit will serve as a slave pin, to hold the ejector catch in place while you turn the assembly over and drive the roll pin back in place. |
| Presto! You now have an extractor only system! The ejector is
a $10.00 part, and you may wish to pick up a spare before starting work.
With the H&R/W&H converted to extractor, you have a very accurate
replica of the 1880 Wurfflein target rifle.
Cheers
|